Posts

Nylon Brake Lines

Image
During the built of N333ST we decided to upgrade the standard brakes to Matco brakes. I am not entirely sure why we decided to do this, but I think we believed that these brakes would provide superior braking power. In hindsight I now realize that the plane has plenty of stopping power using the standard brakes. Anyway, trouble started during flight testing. After 10 hours or so we noticed a brake fluid leaking from one of the brakes. A friendly mechanic fixed the leak by tightening the fittings that connect the nylon brake lines to the caliper. Unfortunately, the problem came back after we finished flight testing and had flown home. We assumed (incorrectly) that the nylon line was not fitted properly into the caliper, and the bent was causing a leak. To fix this I ordered a bunch of brake line parts online and tried to install a contraption to better line up the brake line with the fitting. Each time, this required bleeding the brakes, which in itself is a pain in the rear. Long stor...

Floor under Back Seat

Image
For some strange reason, there is no floor under the back seat. I guess Sling expects the back seat to cover any cold air leaks and stop stuff from falling into the space below. This seems really sub-optimal, dangerous, and needs to be addressed. Without a floor, the seat belt buckles can be pushed through the seat and fall into the space below which houses many important linkages that are needed to fly the plane, so that could be bad. Also there is a huge amount of cold air leaking into the cabin from underneath the seat. To fix this I decided to add aluminum floor panels under the rear seats, to close up the space. They are mounted with rivnuts, covered in carpet, and easily removed for inspection. The final result shown in the first picture.  It is an easy build; you need a rivnut tool, metal scissors , rubber mallet, and a few others. Measuring, fitting, and installing requires various advanced yoga poses, but it is doable. First I made a cardboard template for the two panels, ...

Prop Controller Failure

Image
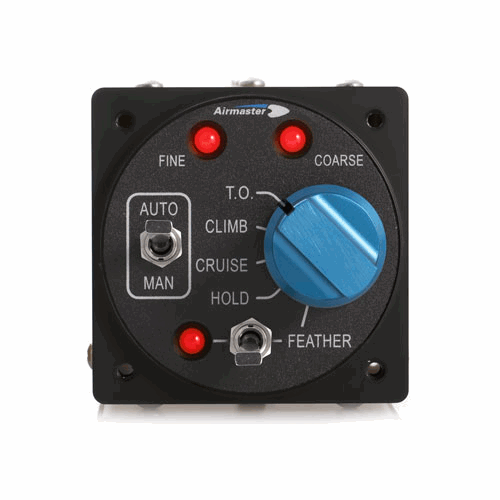
 On our way back from Oshkosh we experienced a prop controller failure. Three blinking red lights, which according to the documentation  indicates "Slipring Brush Worn Out". This had to happen at the worst possible time just as we were arriving at Wendover airport ( KENV ) which is at an altitude of 4200 feet and was reporting 45C.  I can't remember the exact density altitude, but it was definitely greater than 8000 feet. Luckily we had some intermittent manual control and we were able to get the prop into a position where we could continue to fly, keeping a close eye on the engine RPM, making sure not to overspeed it.  After refueling we departed using RW08 (10000'), and we were able gain altitude without any trouble. But during the climb out, to add insult to injury, the GTN650 decided to overheat and report a "Cooling Fan Failure". Luckily that cleared up as we got into higher and (slightly) colder air. Back in KPAO I emailed  Airmaster  in New Zealand. ...

External Static Air Intake

Image
When we finished the build of N333ST, the static air intake was located behind the panel. This has been so for all Slings built so far. However, as we have fixed some cabin air leaks the internal pressure has changed and the airspeed is now clearly reading too high by perhaps 20 knots. That is not a good situation.  So this week I returned to TAF in Torrance to install the newly released External Static Air intake kit. The kit consists of two external ports, some tubing, an intake switch that is mounted in the instrument panel, and some instructions. We were the first to install the kit. Shawn completed the installation in a few hours, and that same afternoon I performed a quick test flight with Jean. The airspeed was much more consistent, and noticeably lower than before.  However, the switch was not installed correctly. Switching to internal static air caused the airspeed to quickly drop. Jean quickly analyzed the problem, and the next day we hooked up the switch correctly. ...

Bay Tour

Image
Bay tour from KPAO via KOAK to the golden gate, then via KSFO to KSQL.

Fuel Leak, found and fixed

Image
A few weeks ago we noticed a strong fuel smell in the cockpit. We had smelled fuel before, but dismissed it. It was probably some fuel left in the fuel sampler that we keep in a side pocket.  Anyway, it was bad enough to investigate further. We took out the side panels off the center console and discovered a leaky fitting. It was on the back of the booster pump. It is not under high pressure, but it leaked anyway.    The leak was minor, and the source was hard to detect, but it was bad enough for some fuel to pool on the cockpit floor. The leaky fitting is in a very awkward place and we did not have the tools to fix. So we decided to cut off the existing crimp fittings with a diagonal cutter and replaced them with adjustable hose clamps that we can tighten with a screwdriver (see below). This MacGyver fix worked good enough to stop the worst of the leak.We were able to fly the plane back to TAF in Torrance, CA. They determined that the fuel pump had an incorrect fitting. ...

Pretty up the fuel stickers!

Image
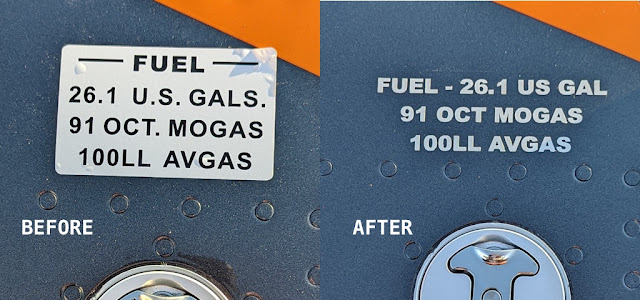
The standard fuel stickers for our Sling TSi are ugly, specially on a dark background. So I decide to replace them with custom lettering. Much better. Still legal, but prettier, and they've stayed on just fine. I ordered the new lettering for both tanks from letterring.com  for $52 (1.24"x3.72", gray, cast vinyl, cut out and removed). You can customize it any way you like.

Recess the G5!

Image
One of the customizations we made to our panel is to recess the G5 (courtesy of Midwest Panels ). Since it is positioned next to the prop controls (also recessed) we thought that would look nice, and it does.  Recessing the G5 is easy using a $60 mounting bracket from Aircraft Spruce . The GTN 650 is mounted right below the G5, so it is now easy to rest your fingers on the top of the GTN650 while twirling the G5 knob during turbulent times!

IPad panel mount

Image
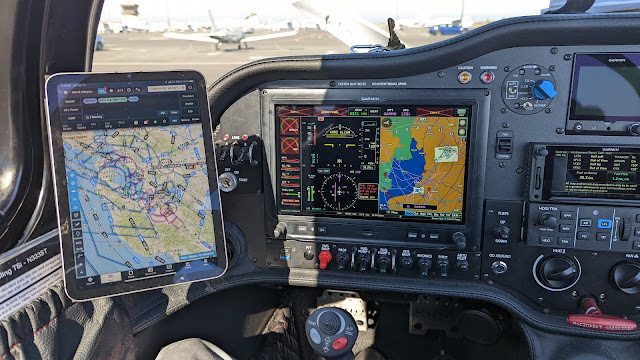
A few weeks ago I got the new Apple iPad mini. The smaller form-factor is perfect for the Sling TSi. However, I don’t want it to be floating around on my knee, so I have been looking for a good way to mount it somewhere so that it is hands-free and does not obstruct the view or the instruments. I think I have found a good solution.  I  got a tablet mount on Amazon (link   here ) with a short adjustable arm and   attached the mounting point to the left of the panel (see below). The panel is made of aluminum, covered in leather. I used self tapping screws with plastic washers, but you could use rivnuts. Here it is with the arm attached.   I don’t like the tablet holder that came with it (too bulky), so instead I used another mounting point (Amazon link here ), and some Velcro to attach the arm to back of my iPad cover. That works great, it does not come off easily, it is height adjustable, and it does not take up much space. I also added a small metal tab to hold ...

I made a tiny POH

Image
To be legal we need to carry a POH in the plane (Pilot's Operating Handbook). I obviously have a hi-res electronic copy in my Foreflight documents folder, but I'm pretty sure you need to also carry a hard copy just in case. So I decided to make a booklet out of it. This was a bit harder than I thought. It is not simply a matter of printing the PDF double sided. Here is what I did to prepare the PDF on my Mac: Download the latest POH from the Airplane Factory. Use Preview to annotate the Front cover and first page with the Aircraft details. To create more space for binding, save the PDF to a new file scaled down to 80%. Download an app called "Booklet" from the App store ($0.99). Use the Booklet app to create a booklet PDF (use default settings) Print double sided, collated on the short edge. Finally I cut, laminated and bound the booklet at my local FedEx store (don’t print it there it is ridiculously expensive). See, that was easy...

And we are done! (almost)

Image
This weekend we flew our plane from Torrance airport to our home base in Palo Alto. It is finally done. There are a few outstanding issues that we need to resolve during the first 100hr service, but it flies great! The pilots are happy!

Testing, testing, err flying :D

Image
Overall We have been focused primarily on flying characteristics, mechanical/airframe squawks.  34+ hours so far and we found a few squawks.  Y/D. The most disappointing squawk has been the Y/D has not shown any effectiveness. We are still trying to figure it out, but it seems the servo cannot handle the rudder and the steerable wheel. It seems too much load (other airplanes, either they have caster wheel or the front wheel steering disconnect when in the air). Brakes vibration We had upgraded the brake system (Matco). During testing, we experienced an intense vibration while braking. As per Matco/Jean recommendation, brake pads had to be replaced.  It now feels way better—still, a bit of beating, particularly when braking at slow speeds. The Panel The panel is fantastic. The GTN650xi is nice. We would have preferred a GTN750xi for its larger screen. The way we are "seeing" the 650 screen is mainly as a data entry auxiliary screen. We are "driving," primarily lookin...

Test Flying at French Valley

Image
In the past week we have flown the airplane for 25 hours and it is going great! It is a wonderful aircraft, very comfortable, and easy to control. After the first flight we both did some landing practice with Jean D'assonville before a solo flight, followed by many hours of maneuvers and pattern work. We need to complete a total of 40 hours of test flights are French Valley (F70) and fix any outstanding issues before we can fly it home. Issues to be Resolved The plane has a Aithre Carbon Monoxide sensor in the panel. Unfortunately this sensor keeps reporting higher than normal CO levels. It could either be a small exhaust leak, or a faulty sensor. This obviously needs to be addressed. The fuel gauges were initially fine, but after a few flights they both got stuck on "full". That needs to be fixed before we continue. During test flights we have been using the remaining fuel calculation of the G3X instead. During cruise you need some right rudder input to maintain level fl...